Project : MZL - 회원가입

Firebase - Authentication : 회원가입 기능 학습 및 적용 >> Firebase : FireStore 연결
- 스크롤 문제
<KeyboardAwareScrollView/>라이브러리 태그로 해결 - 휴먼에러..
1. UI Layout 만들기
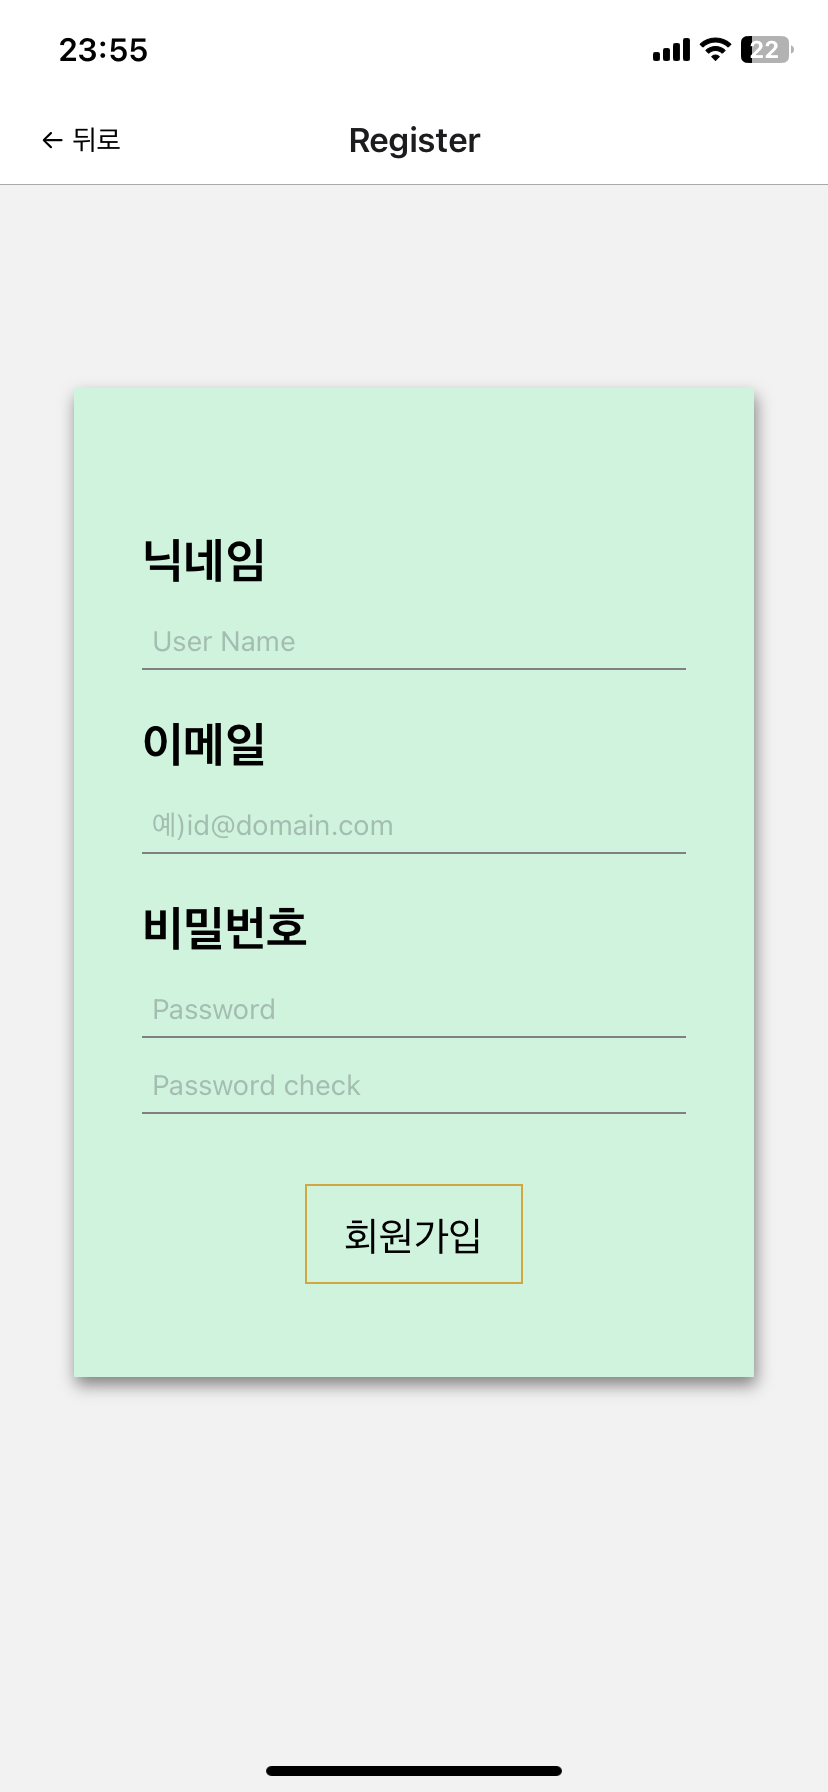
<KeyboardAwareScrollView
  extraScrollHeight={150}
  style={{ paddingHorizontal: 30 }}
>
  <AuthRegisterContainerView>
    <Text style={{ color: 'red', height: 20 }}>{alertText}</Text>
    <View>
      <TitleText>닉네임</TitleText>
      <InputBox
        value={displayName}
        onChangeText={setDisplayName}
        placeholder="User Name"
        ref={focusName}
      />
    </View>

    <View>
      <TitleText>이메일</TitleText>
      <InputBox
        value={email}
        onChangeText={setEmail}
        placeholder="예)id@domain.com"
        ref={focusEmail}
      />
    </View>

    <View>
      <TitleText>비밀번호</TitleText>
      <InputBox
        value={password}
        onChangeText={setPassword}
        placeholder="Password"
        ref={focusPw}
        // 배포시 활성화
        // autoComplete="password"
        // textContentType="password"
        // secureTextEntry={true}
      />
      <InputBox
        value={passwordCheck}
        onChangeText={setPasswordCheck}
        placeholder="Password check"
        ref={focusPwCheck}
        // 배포시 활성화
        // autoComplete="password"
        // textContentType="password"
        // secureTextEntry={true}
      />
    </View>

    <Buttons onPress={() => onSubmitRegister()}>
      <ButtonsText>회원가입</ButtonsText>
    </Buttons>
  </AuthRegisterContainerView>
</KeyboardAwareScrollView>
UI를 만들면서 키보드 활성 시에 높이가 고정되어있는 이슈로 스크롤이 되지않아 <KeyboardAwareScrollView/> 라는 라이브러리를 사용했다..
이 문제로 퍼블리셔로 재직하던 직장에서 골머리를 썩은 적이 있는데 팀원중 한분이 라이브러리를 추천 해주셔서 아주 간단하게 해결되었다.. (에러 해결 참고)
그렇게 라이브러리로 가져온 태그로 상위를 감싸주었고, 크게 닉네임, 이메일, 비밀번호, 비밀번호 2차 확인 부분으로 나누었다
하지만 프로젝트 기능사항으로 입력값에 대한 유효성 검사를 통해 메세지를 입력해주는 Text가 필요해서 setState를 활용해 Text 를 미리 넣어 주었다 ( 아래 상세내용 작성 )
2. 유효성 검사
// 유효성 검사 진행
if (!displayName) {
  alertTextTimer('닉네임을 입력해 주세요');
  focusName.current.focus();
  return;
} else if (!email) {
  alertTextTimer('이메일을 입력해 주세요');
  focusEmail.current.focus();
  return;
} else if (email.indexOf('@') == -1) {
  alertTextTimer('이메일 형식이 아닙니다.');
  focusEmail.current.focus();
} else if (!password) {
  alertTextTimer('비밀번호를 입력해 주세요');
  focusPw.current.focus();
  return;
} else if (!passwordCheck) {
  alertTextTimer('비밀번호 재입력 입력해 주세요');
  focusPwCheck.current.focus();
  return;
} else if (password.length < 6) {
  alertTextTimer('비밀번호는 6자리 이상 입력해주세요!');
  focusPw.current.focus();
} else if (password !== passwordCheck) {
  alertTextTimer('비밀번호를 다시 확인해 주세요');
  focusPwCheck.current.focus();
  return;
}
위처럼 해당 내용의 값이 없는상태 즉, false == !state를 활용해서 빈값에 대한 유효성검사를 진행했고, 빈값에 대한 포커스를 진행시켜주기 위해 useRef Hook을 사용해서 해당 TextInput 태그에 focus() 함수를 실행 시켜 주었다.
나머지는 보이는 메세지와 같다
여기서 내가 만들어 사용한 alertTextTimer 함수를 소개하겠다
const alertTextTimer = (message) => {
  setAlertText(message);
  setTimeout(() => setAlertText(''), 3000);
};
위에서 언급했던 부분의 유효성검사 메세지를 받도록 state를 인수로받은 텍스트로 update를 시켜주었고, setTimeout을 통해 해당 텍스트는 3초가 지나면 사라지도록 해주었다
원문에 있던 동영상은 서비스 종료로 재생할 수 없습니다.
3. authentication >> 회원가입 api
await createUserWithEmailAndPassword(auth, email, password)
  .then(async (userCredential) => {
    console.log('🚀 userCredential', userCredential);
    const user = userCredential.user;
    // update 닉네임
    await updateProfile(auth.currentUser, {
      displayName,
    })
      .then(() => {
        reset({
          index: 0,
          routes: [{ name: 'Tabs', params: { screen: 'Home' } }],
        });
      })
      .catch((error) => {
        const errorCode = error.code;
        const errorMessage = error.message;
        alertTextTimer('🚨: update profile error', errorCode, errorMessage);
      });
  })
  .catch((error) => {
    const errorCode = error.code;
    const errorMessage = error.message;
    if (errorMessage.includes('email-already-in-use')) {
      alertTextTimer('🚨', '이미 가입된 이메일입니다.');
      focusEmail.current.focus();
      return;
    }
    alertTextTimer('🚨', errorCode, errorMessage);
  });
Authentication의 API 인 createUserWithEmailAndPassword 함수를 사용해 회원가입을 진행시켰다. Authentication을 연결한 변수인 auth와 state로 TextInput 에서 받아오는 email 과 password 이렇게 3개를 인자로 받아오고 API가 정상 작동했을 때,
updateProfile 이라는 API로 해당 유저의 프로필의 닉네임을 업데이트 시켜주었다.
여기서 email과 password, displayName 은 es6 문법이 적용되어 기존에 email: email 을 반복하지 않아도 알아서 들어가도록 키와 밸류가 동일하다면 함축형을 인지해 자동으로 위와같이 할당해 줄 수 있다.
또한, .catch문을 이용해 에러를 유효성검사에서 활용한 함수를 적용하여 어떠한 에러가 났는지를 명확하게 알려줄 수 있었다
4. 회원가입 정상작동
.then(() => {
  reset({
    index: 0,
    routes: [{ name: 'Tabs', params: { screen: 'Home' } }],
  });
})
작동이 정상적으로 이루어 진다면 .then 함수들이 작동될 것이다
그래서 회원가입이 완료가 되면 ux적으로 편리하도록 reset 함수를 활용해 다시 Home 의 상태로 돌아가게 해준다
이 전에는 navigate를 사용해서 Home으로 핸들링을 했었는데 tabs 부분이 나오지 않고, 컴포넌트만 렌더링 되었던 현상으로 다시 reset을 활용해 refactoring을 진행했다!
+ 오류 해결
before - 해결 전, after - 해결 후 (동영상은 서비스 종료로 재생할 수 없습니다.)
+ 오류 해결 방법
라이브러리 공식 깃허브에 상세한 내용이 나와있다. 짧게 요약하자면,
npm i react-native-keyboard-aware-scroll-view --save
- 위 명령어를 통해 인스톨
import { KeyboardAwareScrollView } from 'react-native-keyboard-aware-scroll-view';
- 사용하고자 하는 컴포넌트에서
import { KeyboardAwareScrollView }
<KeyboardAwareScrollView>
  <AuthRegisterContainerView>. . .</AuthRegisterContainerView>
</KeyboardAwareScrollView>
- import 한 태그로 상위 태그 감싸주면 끝!
- 유효성검사에 통과되지 않는다면 실행할
alertTextTimer()함수 만들어주었다 ( 메세지 보여주고 사라지기 ) 그 후useRefHook을 활용해focus()가 실행되어 해당하는 TextInput으로 자동적으로 커서가 생기게 했다 createUserWithEmailAndPassword함수는 auth key / email / password 이 세개가 필수 값이다- 닉네임인
displayName은 함께 전달하지 못하기 때문에 회원가입 직후updateProfile함수로 같이 닉네임을 넣어주었다 - 회원가입이 완료가 되면 ux적으로 편리하도록
reset함수를 활용해 다시 Home 의 상태로 돌아가게 해준다 KeyboardAwareScrollView라이브러리로 키보드 활성시 높이 이슈 간단하게 해결